
Easy DIY Tartan Wreath 2.0

Easy DIY Tartan Wreath in Newfoundland tartan, original version, 2014.
I made the wreath at the top for a DIY video segment for House & Home. Somehow it did not make it home with me when I packed up my office and moved out for the freelance life a year later. I kinda liked it, so I decided to reprise the project this year.

Easy DIY Tartan Wreath in Ontario Tartan, version 2.0, 2016.
Above is my 2016 version in its new home at our Tweed House. The project is dead-easy, and if you know anything about me and DIYs, you know that's how I like them. Here's the low down on the full how-to. (It'll honestly take you about as long to read the instructions as it will to make the thing, so if you are reasonably competent at DIY, just jump in.)
Materials
1 styrofoam wreath form (I got mine at Michael's)
1 meter of tartan fabric (this one is Ontario tartan cotton broadcloth from Fabricland)
1 sprig of pheasant feathers (also from Michael's)
1 or 2 pinecones, real ones or glitter ornaments
1-3 magnolia leaves
Jute twine (um, how gorgeous are my twine spools? So good right? I brought them back from Manufactum in Frankfurt — fave shop!)
NOT SHOWN: scissors, hot glue gun, secondary fabric used to make bow (can also use ribbon)
Instructions
1. Measure a width of 8 inches of fabric, use scissors to make about a 3-inch-long cut in fabric. Grasp both sides of the fabric in your hands and rip the 8-inch section away from the rest of the fabric.
2. Repeat this to create 4 strips of fabric.
3. Using hot glue gun, glue end of first strip of fabric to back side of wreath form.
4. Wrap fabric strip around wreath from, concealing the glued edge and bunching the fabric slightly as you go.
5. Glue end of first strip to back of wreath form.
6. Hot glue end of second strip over end of first strip and continue wrapping around wreath form.
7. Repeat glueing and wrapping until wreath form is covered.
8. Create a bow with another strip of fabric — either the same tartan fabric (as version 1 of my wreath) or a contrast fabric (as version 2 of my wreath).
9. Hot glue bow in place.
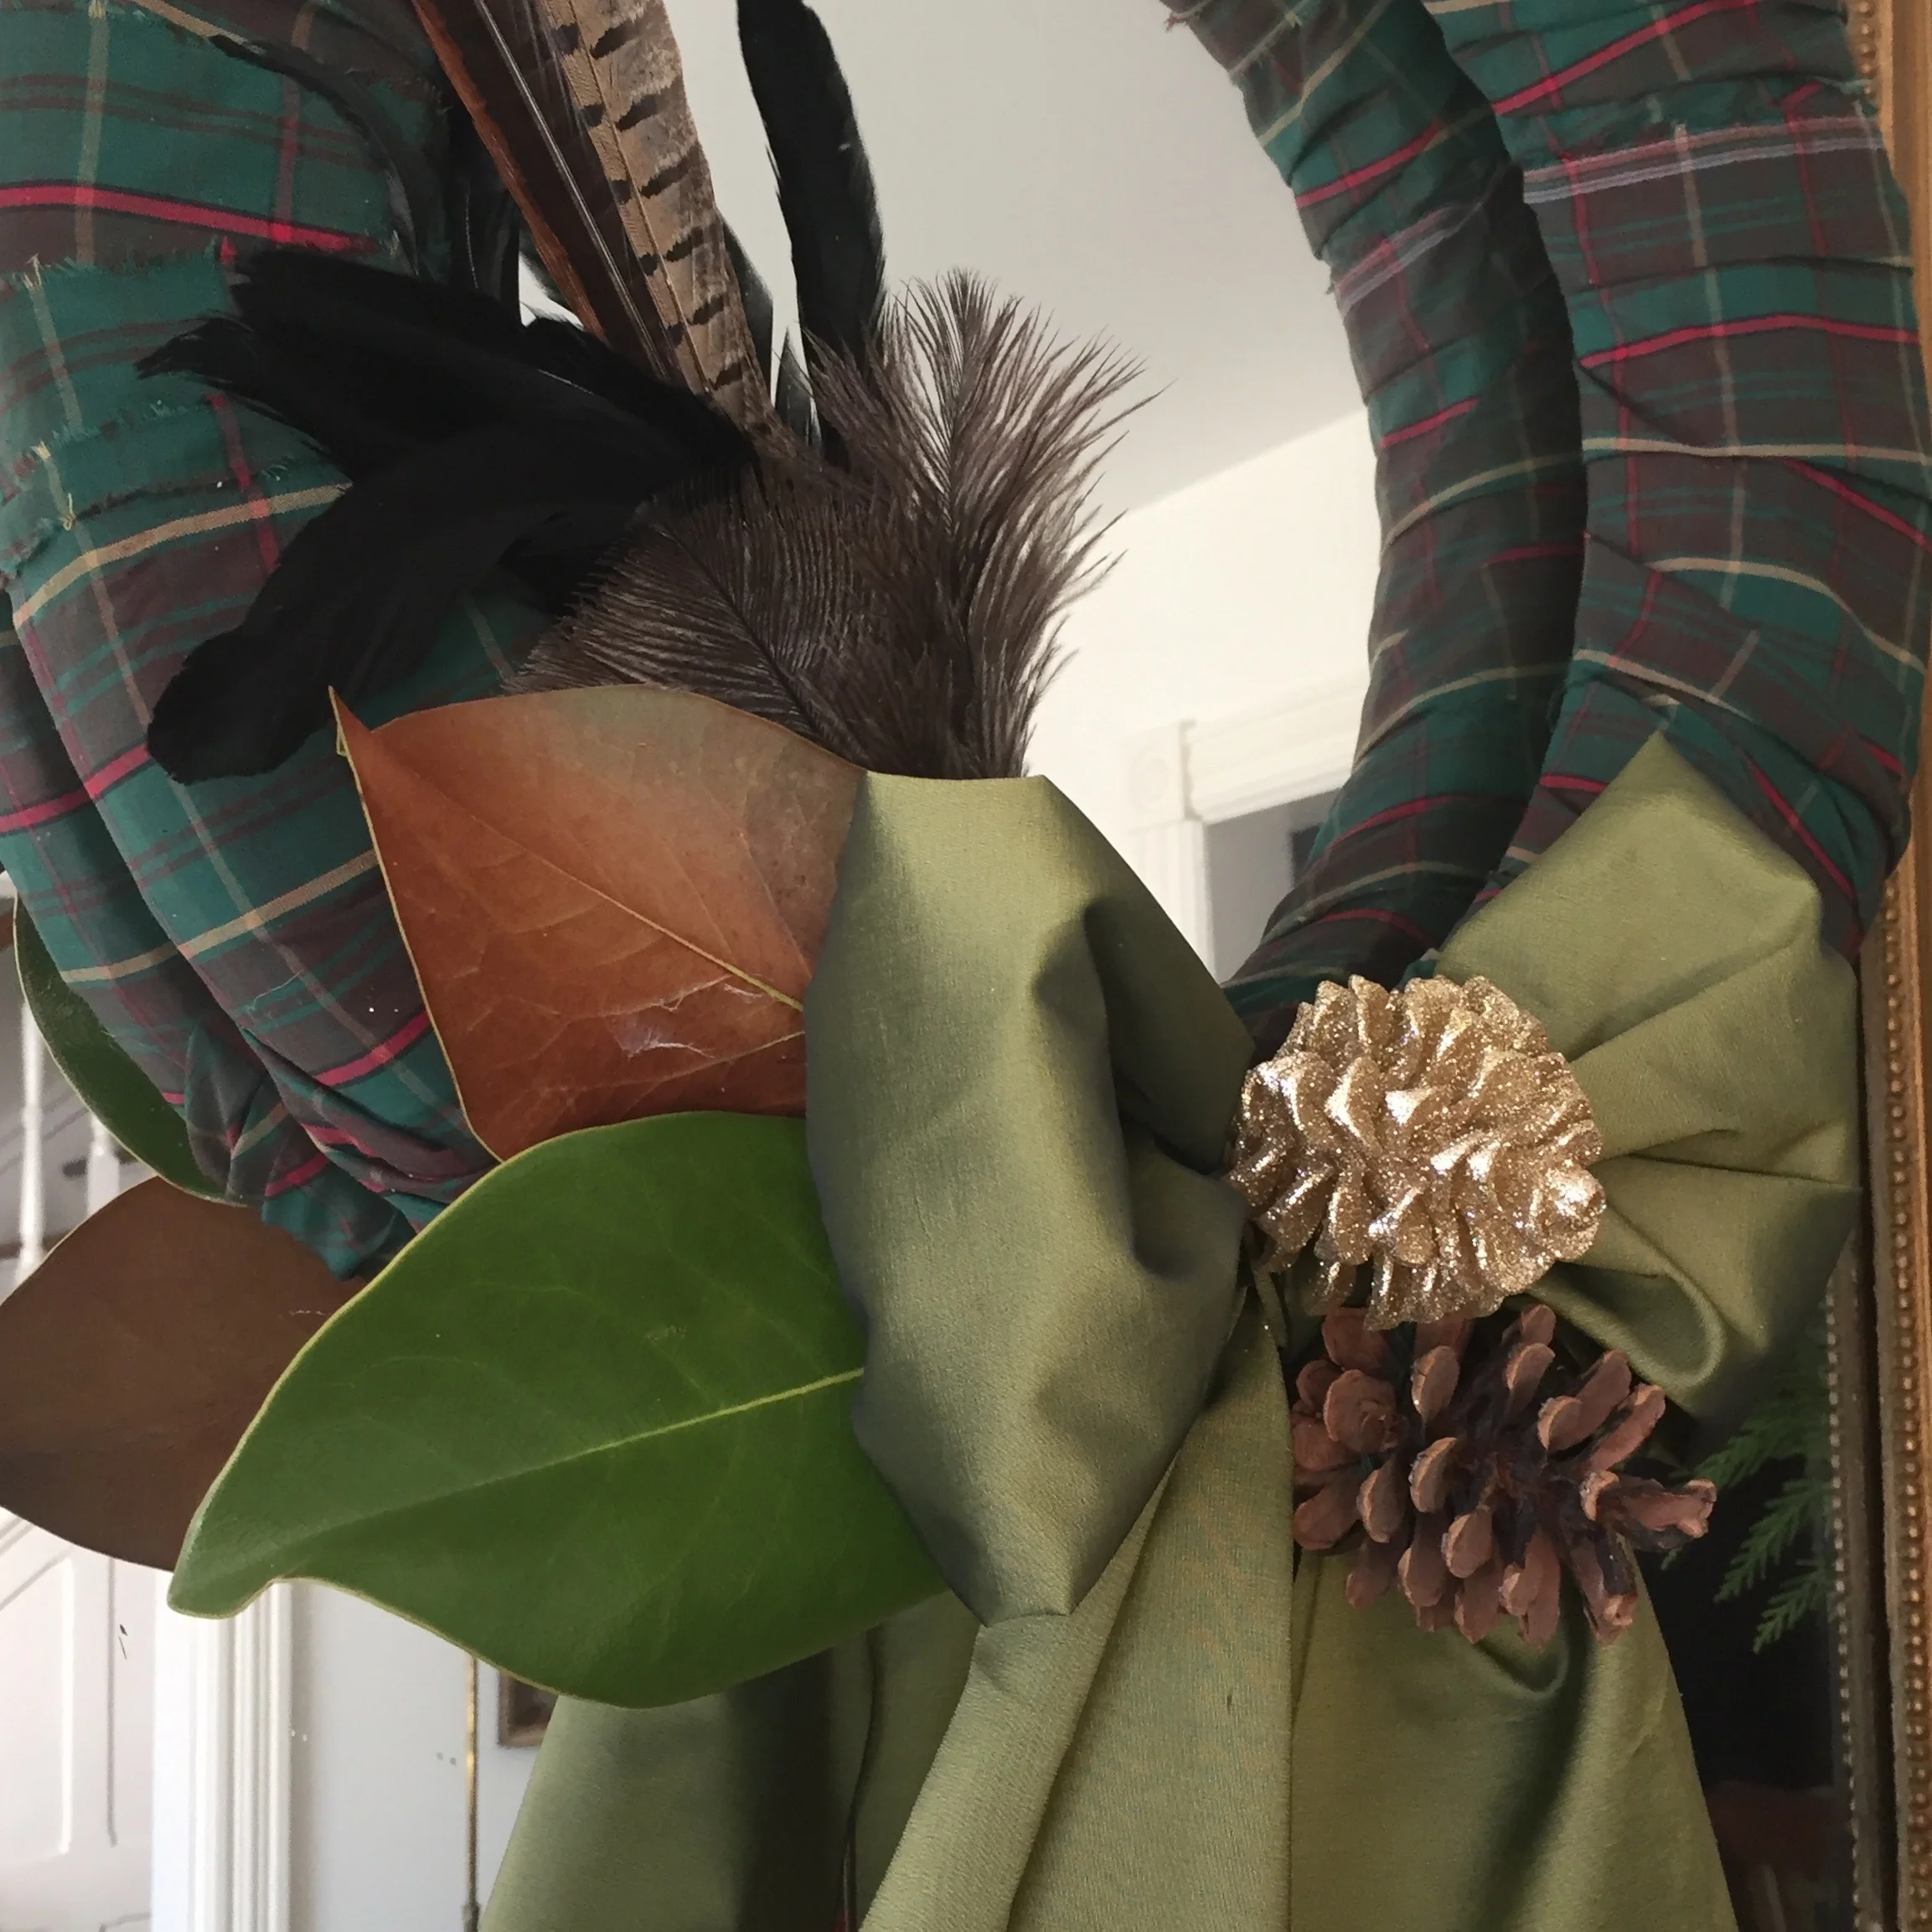
10. Add feather, leaf and pinecone embellishments using twine or glue.
11. Hand using clear fishing line or twine.
I had to look up this tartan because I did not recognize it. But then when I did I was a tad embarrassed. It's the tartan of this fine province of Ontario. HA! How could I not have known? Not sure if I've mentioned before, but in the world of tartans and my love of them I do not love them all. I have a particular fondness for the ancient and hunting varieties that are more muted in colour tone. I mostly turn my nose up at the happy bright varieties.
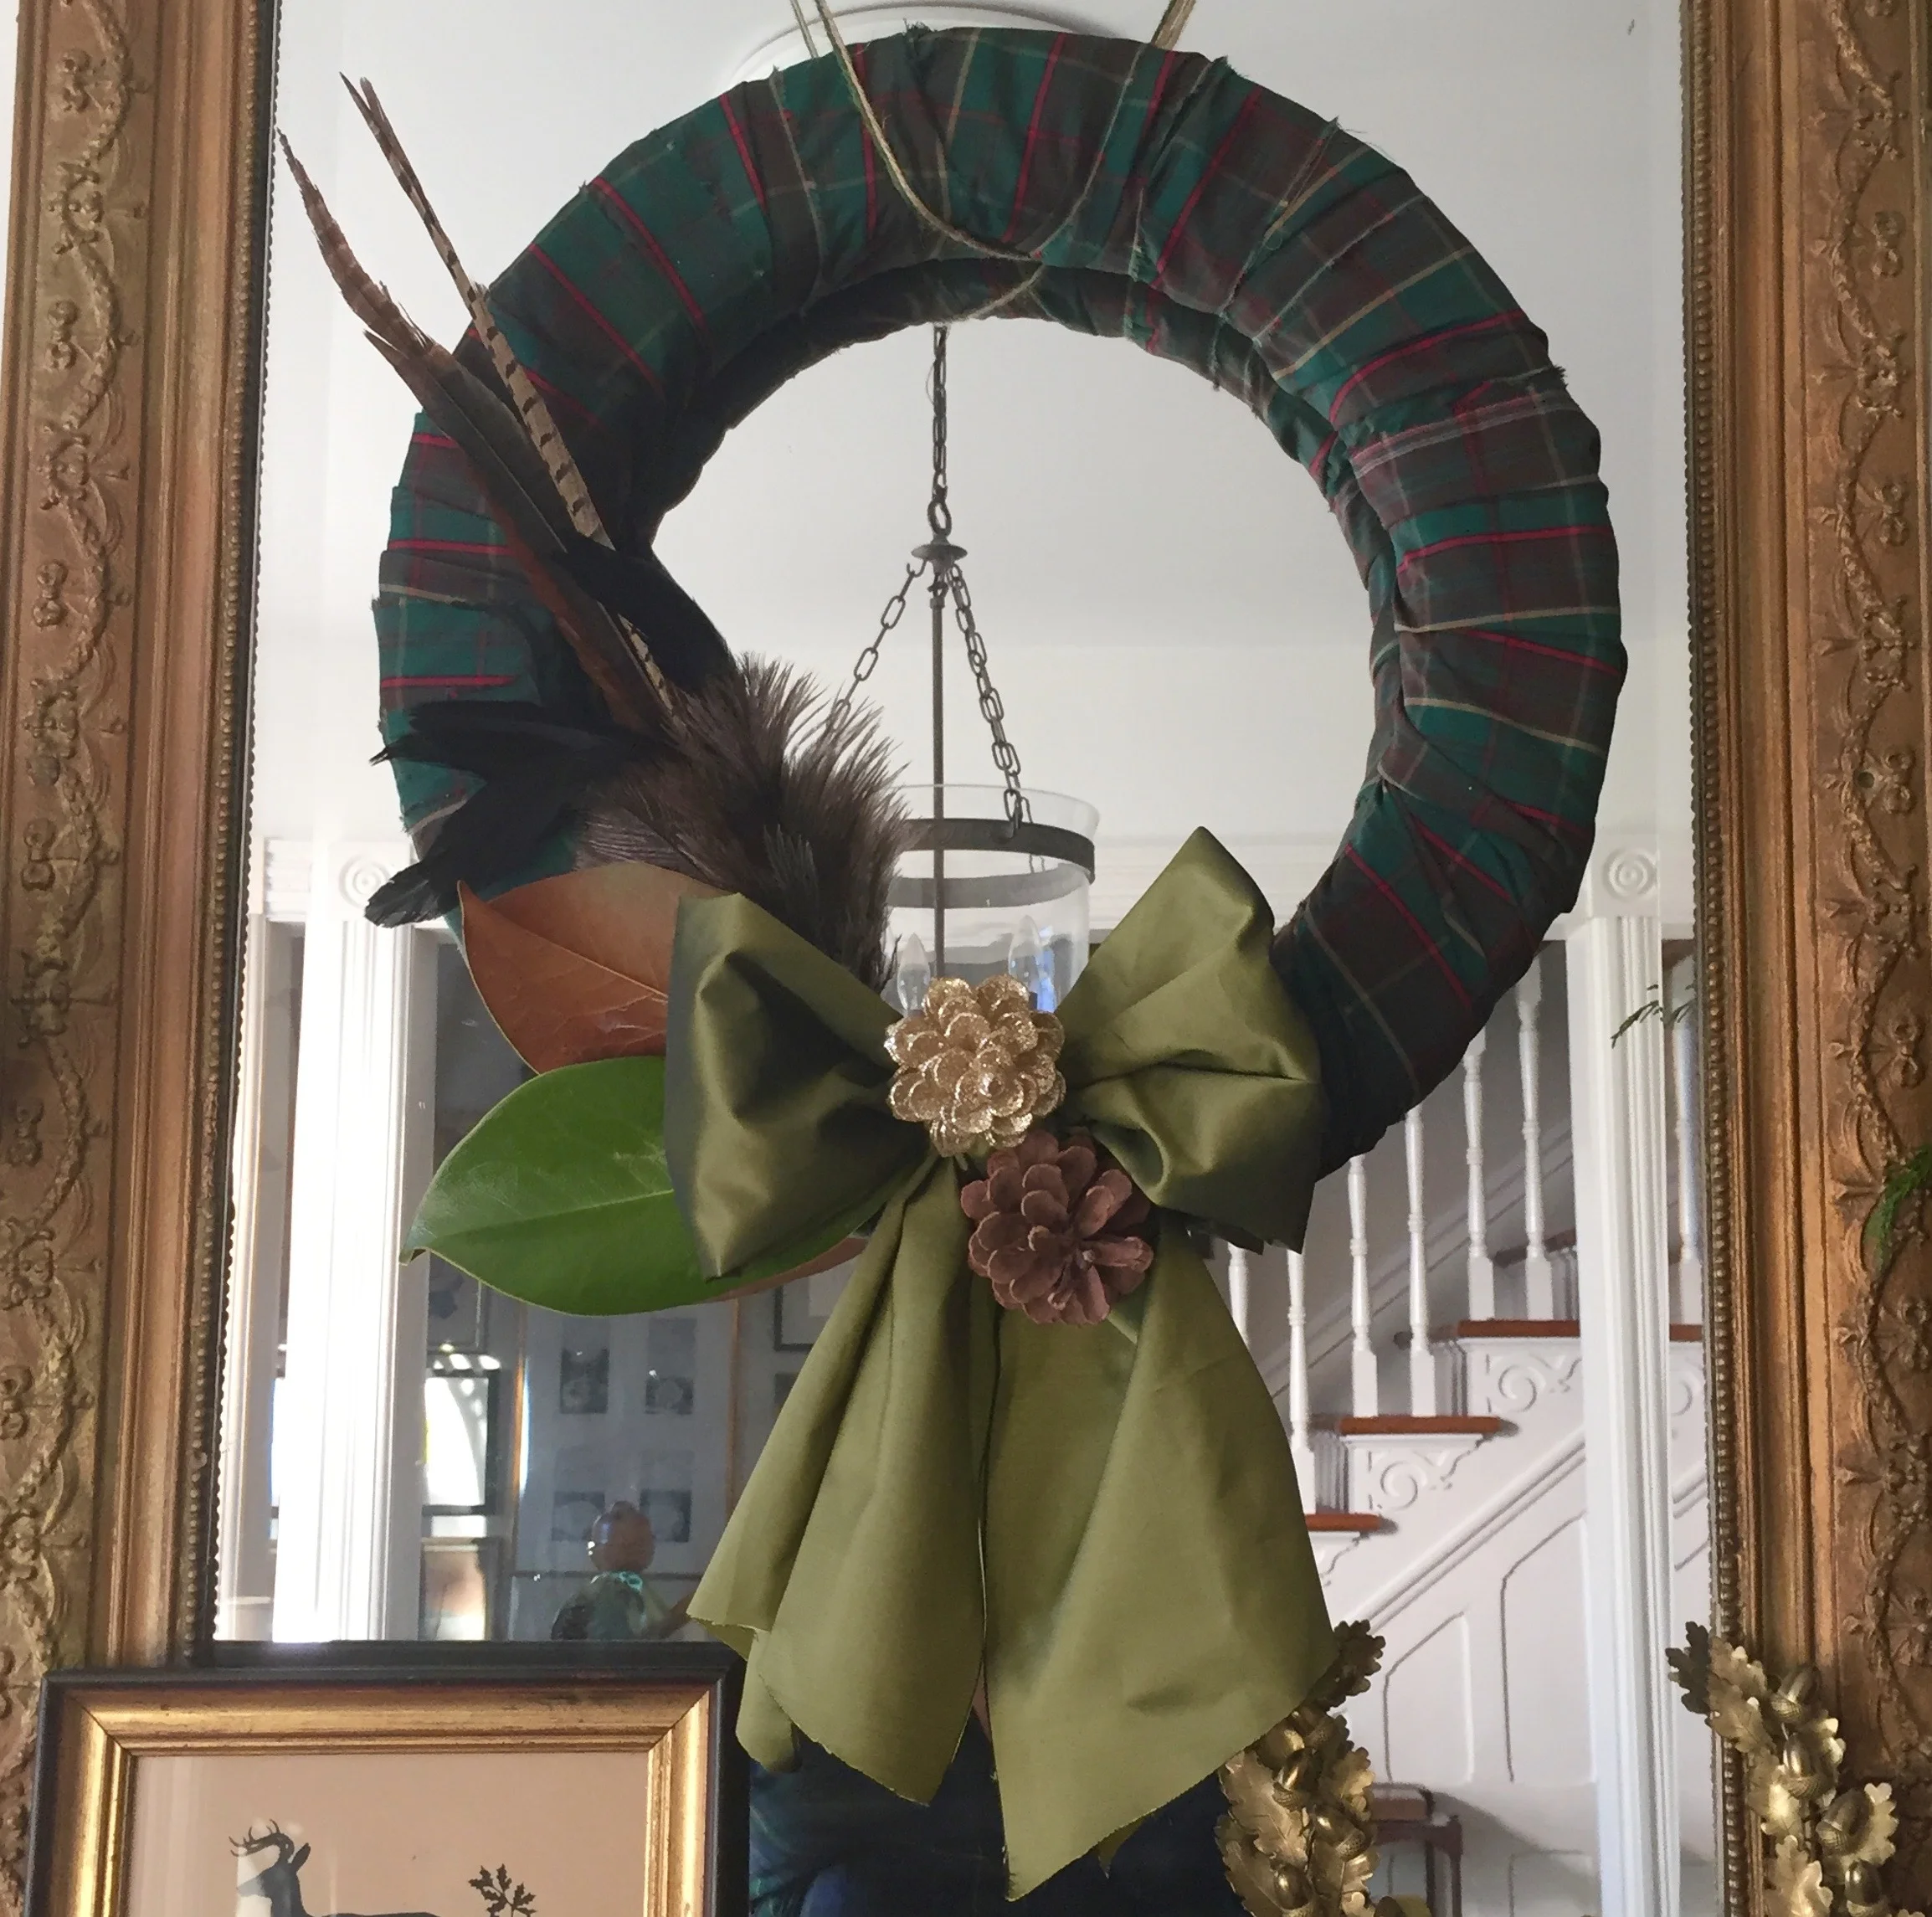
In other fabric news, I happened to find this green taffeta in my scrap bin when I was finishing up my wreath and decided to use it for the bow. I didn't hem or finish any of the edges I just folded in raw edges on the bow section but left them raw for the bow tails. The raw fringey, thready edges are my favourite part of this project and are my nod to Vivienne Westwood. A little deconstruction can help knock a bit of sweetness off a DIY.
I decided to add one gold pinecone ornament and one real pinecone because two gold ones was just too much sparkle for my taste (too sweet). I tied them on with twine. A die-hard DIYer would have had a million diff types of wire on hand to do the job, but whatever. Twine works. The leaves and feathers are just poked into place through the layers of fabric.
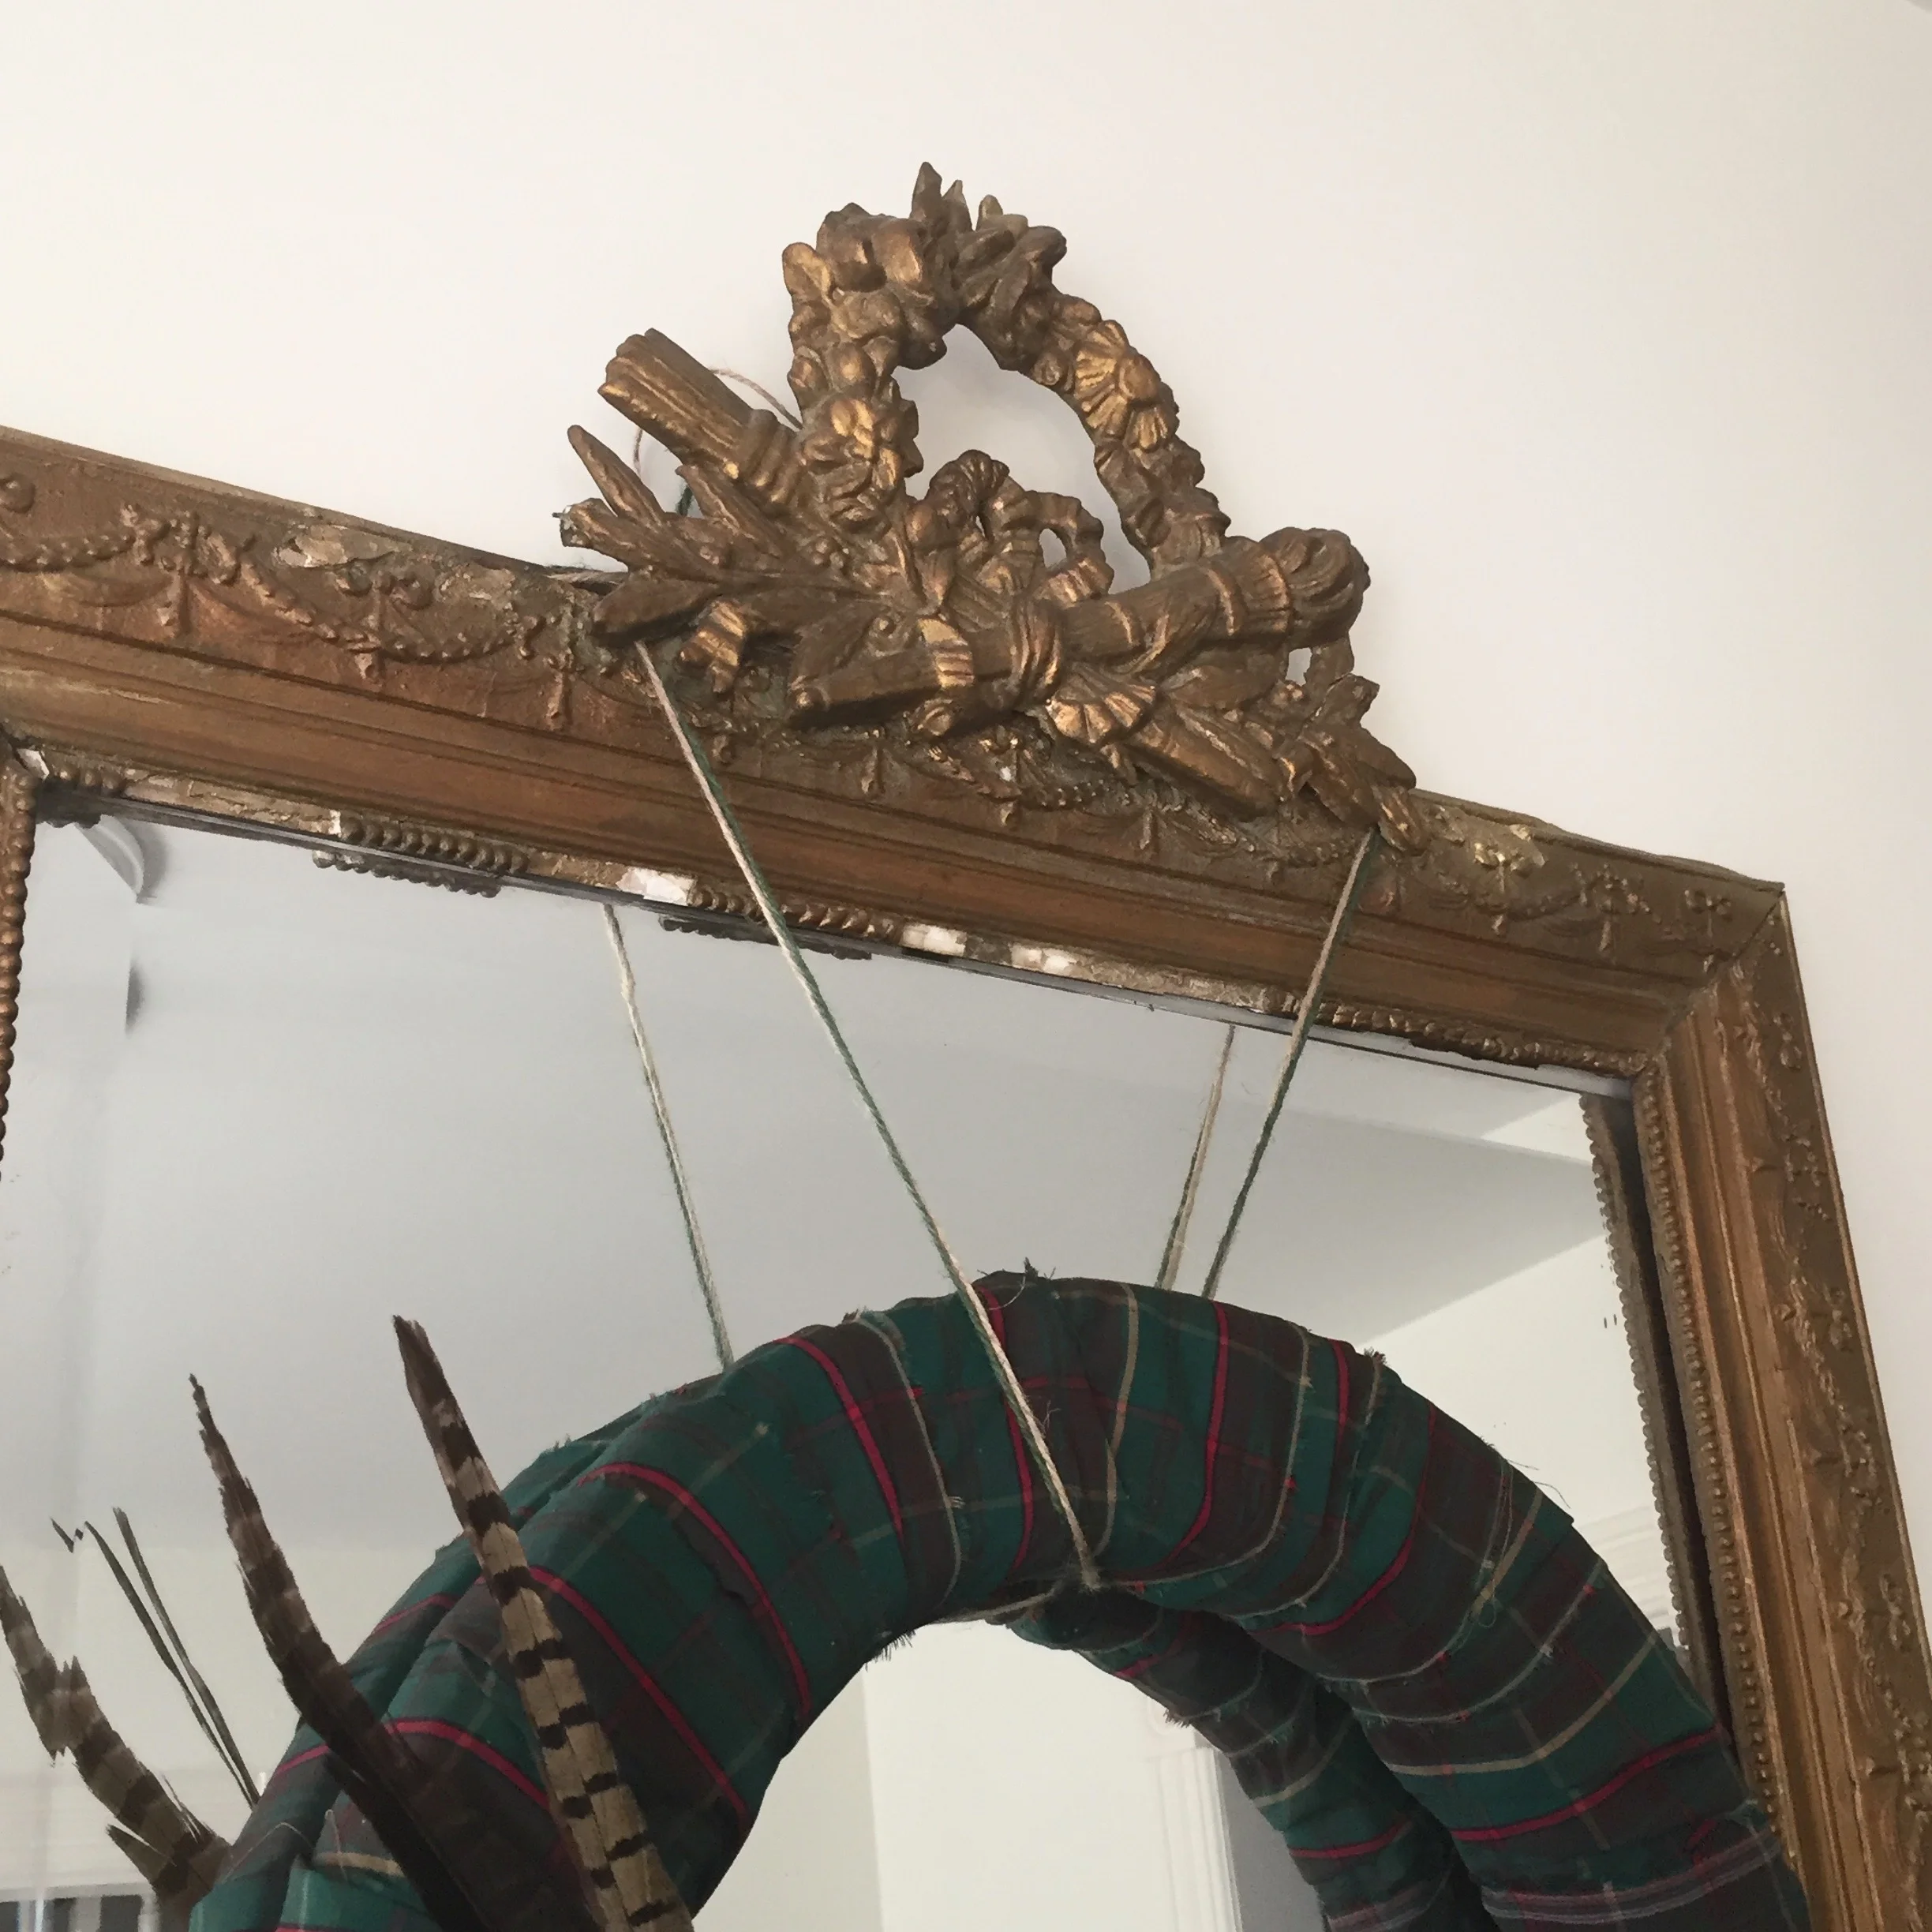
I designed this wreath specifically to hang on this mirror. Wreaths on mirrors is a favourite Holiday decorating idea, but sometimes they can be quite heavy and one worries about both the wreath and the mirror. This wreath is mostly styrofoam so light as, well, a feather (or two), so it's great for hanging on a mirror. I used two tones of jute twine and hung the light wreath from the top carving detail on the wreath.
Check out this fun video where you'll catch me making the original 2014 version along with 3 more gorgeous wreaths you can try.